Sunday, February 28, 2010
The Writing on the Wall- Putting Words on Your Walls
I designed it in photoshop, printed it full size, put contact paper on both sides, used an knife to cut out each. individual. letter. then traced it on the wall and painted inside the lines. Of course, I couldn’t use it as a stencil because the walls were too textured (have I mentioned that?) Yes, I thought about using a projector but I did this in the entry hall and it’s just too small to get the projector far enough away from the wall.
Here’s how it turned out.
See the texture. Who’s idea was that?
Sometime later I discovered the company Uppercase Living. They have all sorts of wonderful wall words and I had to have one. I forgot all about my unruly walls and ordered “Create” for my craft room. I worked so hard getting that sucker on the walls I was sore the next day. What did I learn? It is possible to put them on textured walls- it will just take longer. You really, really, really have to put a lot of pressure when you are rubbing them on. Also, your fingers are going to be much better tools than the applicator thing they recommend. Go Slowly and rub each letter with your fingers to get stuck down. If you press too hard the spiky texture will poke right through the vinyl-not good. It won’t lay as flat as it would if you had flat walls but it works and hasn’t peeled off yet.
Attempt #2. I tried a custom one for my son’s room. It was much easier to apply (if you call 7 months pregnant on a ladder easy) because the letters were thinner. I believe it did take me about 4 days to get it finished though.
And the last one. You can see more about it HERE. Someone had the good sense to re-texture the kitchen before we moved in. I can say that the letters look better but they were not much easier to install.
I think these work best on walls that are completely smooth. I would love walls that are completely smooth. Meanwhile I will make due with what I have.
Linking up with:
Show and Tell Friday @ My Romantic Home
Monday, February 22, 2010
The Letter S
This was a special order- purple and gold, super girly. It turned out to be one of my favorites. Purple rhinestones, gold glitter… need I say more?
Here are some details. The scrollwork is painted chipboard the a crystal glaze applied to make it super shiny. I used the German Glass Glitter again and I still love it. It’s actually easier to work with than regular glitter. I’ll post more about it soon and when I do I’ll link it back here.
Hit up my custom letters button at the top to see more creations!
I’m Linking up with:
Check out all the other great links!
Sunday, February 21, 2010
A Little Organization in the Kitchen
I have to be honest. I had a baby and I lost control of my house. I mean, I was no neat freak before but now, it’s just a disaster. Here’s what my kitchen nook looked like last week.
Oh my, I’m embarrassed to even show this. It’s bad folks, but it’s real life. The good, the bad, and the messy. Here’s the deal. The bench was there when we moved in and nothing else (of course, it wasn’t blue either). It was an awkward space so this was our solution to fix it. It worked for awhile until we got behind in life. I love the rail system the kept my spices but it was a bit far from where I actually cooked. I dream of turning my pantry into a mud room since it’s right inside the back door and having cute lockers like a Pottery Barn catalog, but that requires money.
Here is my solution.
1st of all, clear the clutter. Or, just move it to another spot to deal with later, that’s what I did. Then, I got bins for all the stuff, each of us have one. Hooks for the bags keep them from being strewn about the room.
I ordered our names from Uppercase Living and applied them to the wall. I have done this in a few other areas in our house and I’ll post a tutorial later- with textured walls it’s not as easy as they say it is.
I gotta tell ya, I’m lovin it. I think I'm going to add out initials to the bins. Not because it’s hard to figure out which bin belongs to which person, but because it would be cute- and I could use some cute.
I was inspired by a blog I read about using trays (I wish I could remember which one) so I placed this tray out to keep our keys and phones in a central location. Wow, it feels good to be organized!
This week I’m linking up here. Check them out and be inspired!
Made It Monday @ The Persimmon Perch
Metamorphosis Monday @ Between Naps on the Porch
Made it for Monday @ Cottage Instincts
Make Your Monday @ Twice Remembered
Just Something I Whipped Up @ The Girl Creative
Toot Your Horn Tuesday @ Silly Little Sparrow
Creative Cats @ Poppies at Play
DIY Day @ A Soft Place To Land
Get Your Craft On @ Todays Creative Blog
Get Your Craft on @ Life as Lori
Strut Your Stuff @ Fireflies and Jellybeans
Make it Yours Day @ My Backyard Eden
Saturday, February 13, 2010
Love these new Crate & Barrel Cubes
They are $79 each and can be stacked in all different ways. I can think of a bunch of different areas that I could use these. Of course, I feel like I need the lamp too…. and probably the vases. You know, to really make it work. You can buy them HERE.
Sunday, February 7, 2010
EAT - Custom Letters
I’m at it again, making all kinds of letters for the home. You can see more HERE, HERE or even HERE.
This time, it’s for the kitchen. I took chipboard letters and covered them with recipes from my favorite magazine, Everyday Food. Then glittered the edges and hung them with ribbon. I needed something on this wall in my kitchen and I like how this turned out.
Most of the recipes are white but I picked some with colors that would work well in my kitchen.
I used the German glass glitter here as I have used in other projects. It’s beautiful and super shiny. It comes in a bunch of colors but I think silver is my favorite.
Super Shine.
Want some of your own? I’ll make ‘em for ya! :-)
I’m linking this up to all my favorite parties. Go and visit and be inspired by all their ideas!
Made It Monday @ The Persimmon Perch
Just Something I Whipped Up @ The Girl Creative
Metamorphosis Monday @ Between Naps on the Porch
Made it for Monday @ Cottage Instincts
Make Your Monday @ Twice Remembered
Toot Your Horn Tuesday @ Silly Little Sparrow
Creative Cats @ Poppies at Play
DIY Day @ A Soft Place To Land
Get Your Craft On @ Todays Creative Blog
Get Your Craft on @ Life as Lori
Strut Your Stuff @ Fireflies and Jellybeans
Make it Yours Day @ My Backyard Eden
Show and Tell Friday @ My Romantic Home
Saturday Nite Special @ Funky Junk Interiors
Wednesday, February 3, 2010
Clear Dining Chairs
A few months ago I was on the hunt for clear dining chairs. We had purchased a table and it had been sitting chairless for a few months. That’s how we roll. It’s one baby step of a project at a time over here so if you don’t have money for chairs, you don’t get them.
Since the dining table was in a narrow space and I like the rug underneath- I thought using clear chairs was a good way to maintain an open feel… and at the time, they were not very common so I liked that aspect as well.
Of course, during my search David on HGTV does a room and uses the very chairs I want. Punk. The room turned out great and the chairs were a big hit. But let me tell you a little something about those chairs. Something I knew but a lot of viewers may not have known. They have been around for awhile, designed by Phillipe Stark and are NOT cheap. Like $400 each not cheap. I don’t pay $400 for much of anything around here. My dining table didn’t even cost $400 so I’m most certainly not going to pay $400 PER CHAIR. I’m sure there is a knockoff but if I remember, it’s still more than I wanted to pay.
Here’s the room David did- you can sort of see the chairs- sort of not because… well, they’re clear.
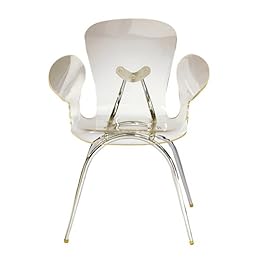
Here are some of the chairs we looked at on this search for clear.
The Ghost Chair from Kartell found HERE- Originals are around $400. Yeah, already ruled these out.
Acrylic Dining Chair from Target found HERE. $159.99 Like it but don’t love it. I that looked a little more classic.
Vapor Chair from CB2 seen HERE. $179.00 Love this chair. They have a barstool too. Only problem is- we don’t have a CB2 anywhere nearby and I couldn’t sit in one. Also, still would love to have a better price. Yeah, we are cheap.
The Tobias Chair from Ikea seen HERE. $99.00. And this is the one we went with. We looked at them in the store for months before we actually purchased them. They are quite comfortable and really look nice. Of course, even at that price we had to purchase 2 then wait a few months and purchase the other 2. Oh well, we made it work.
Here’s a photo of them in our house.
Well, that doesn’t tell you very much at all since now, we have a very cool rug underneath and the backpack is usually not allowed to rest there. But I don’t feel like taking another picture right now so this will have to go.
Hopefully this helps if you are on a quest for clear dining chairs!
Monday, February 1, 2010
Love Letters
I just took wooden letters and covered them in papers and ribbons and accessories and anything else I could get my hands on.
A close up of some layered paper and accessories.
I love using fibers- I think it really adds a lot of dimension. The dotted paper on the right is flocked so it’s nice and soft.
I wanted to try and get a pic of the glitter. I covered the edges in hot pink German Glass Glitter. More on that later but it makes for a super glittery edge- I just love it!
You can check out more of my letters HERE or HERE.
This week, I’m linking up with:
This week I’m linking up with:
Made It Monday @ The Persimmon Perch
Just Something I Whipped Up @ The Girl Creative
Making the World Cuter
Creative Cats @ Poppies at Play
DIY Day @ A Soft Place To Land
Get Your Craft On @ Todays Creative Blog
Get Your Craft on @ Life as Lori
Strut Your Stuff @ Fireflies and Jellybeans
Make it Yours Day @ My Backyard Eden
Be sure and check out all their creative ideas!